Unreal Engine Blueprint – Disable Every Key Except One
Below is the easiest way I know to leave only one key active and this overview will show you how to set this up in your specific blueprint(s).
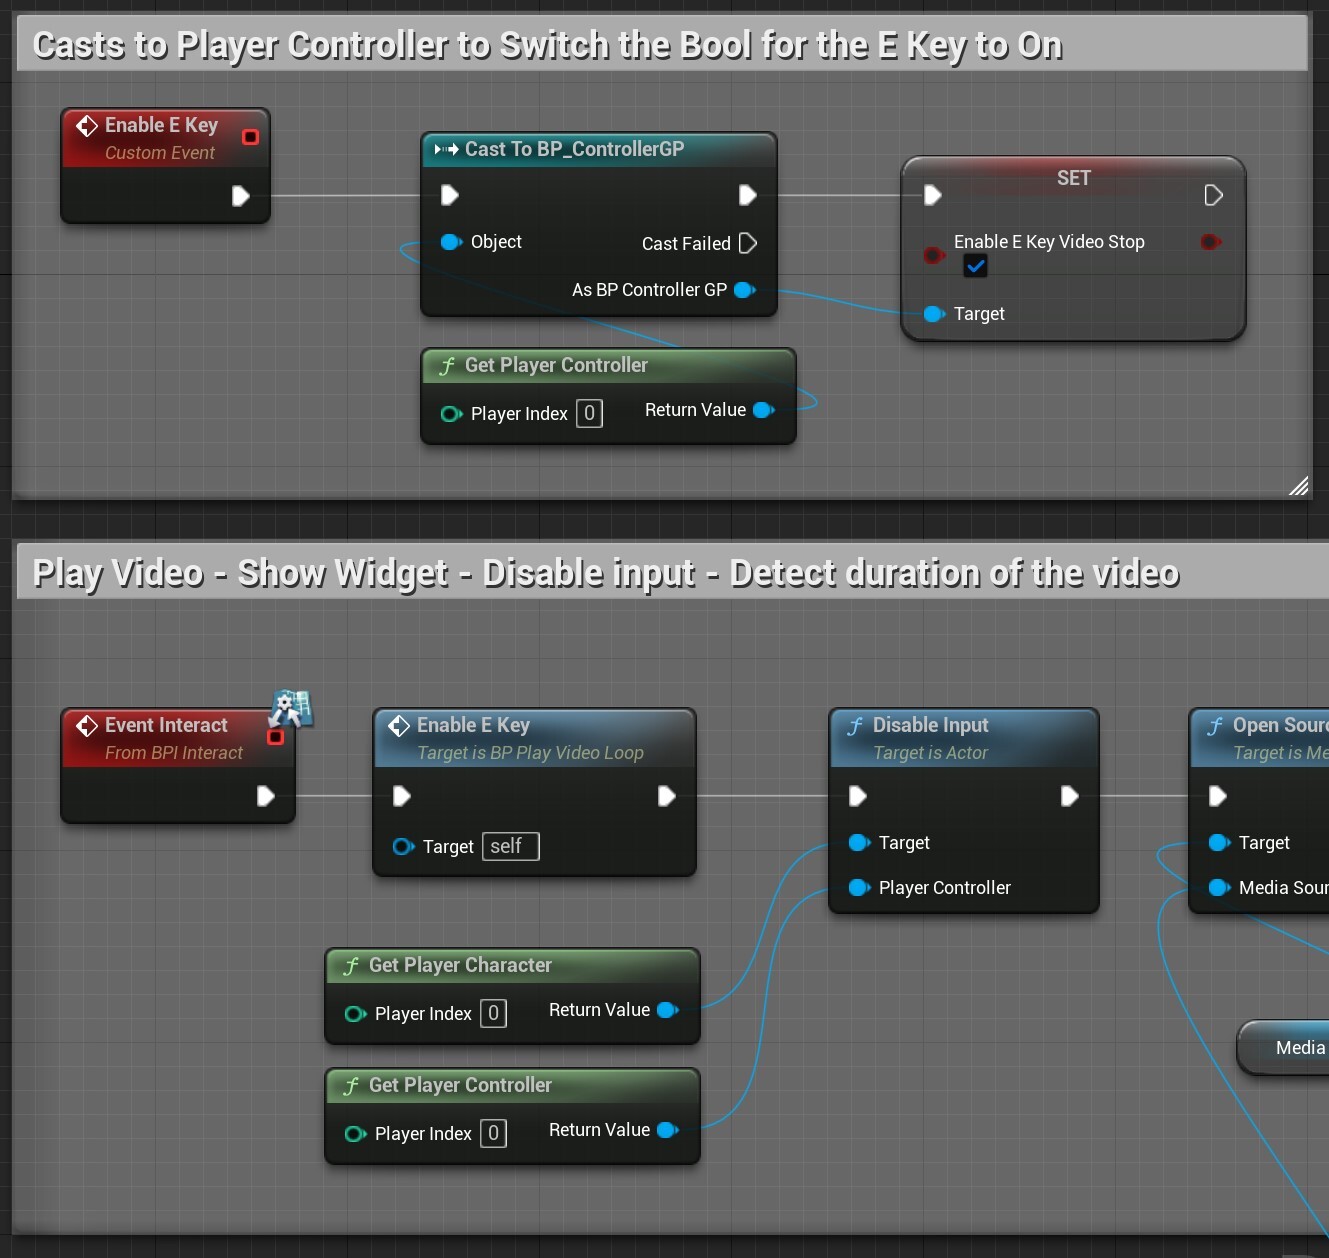
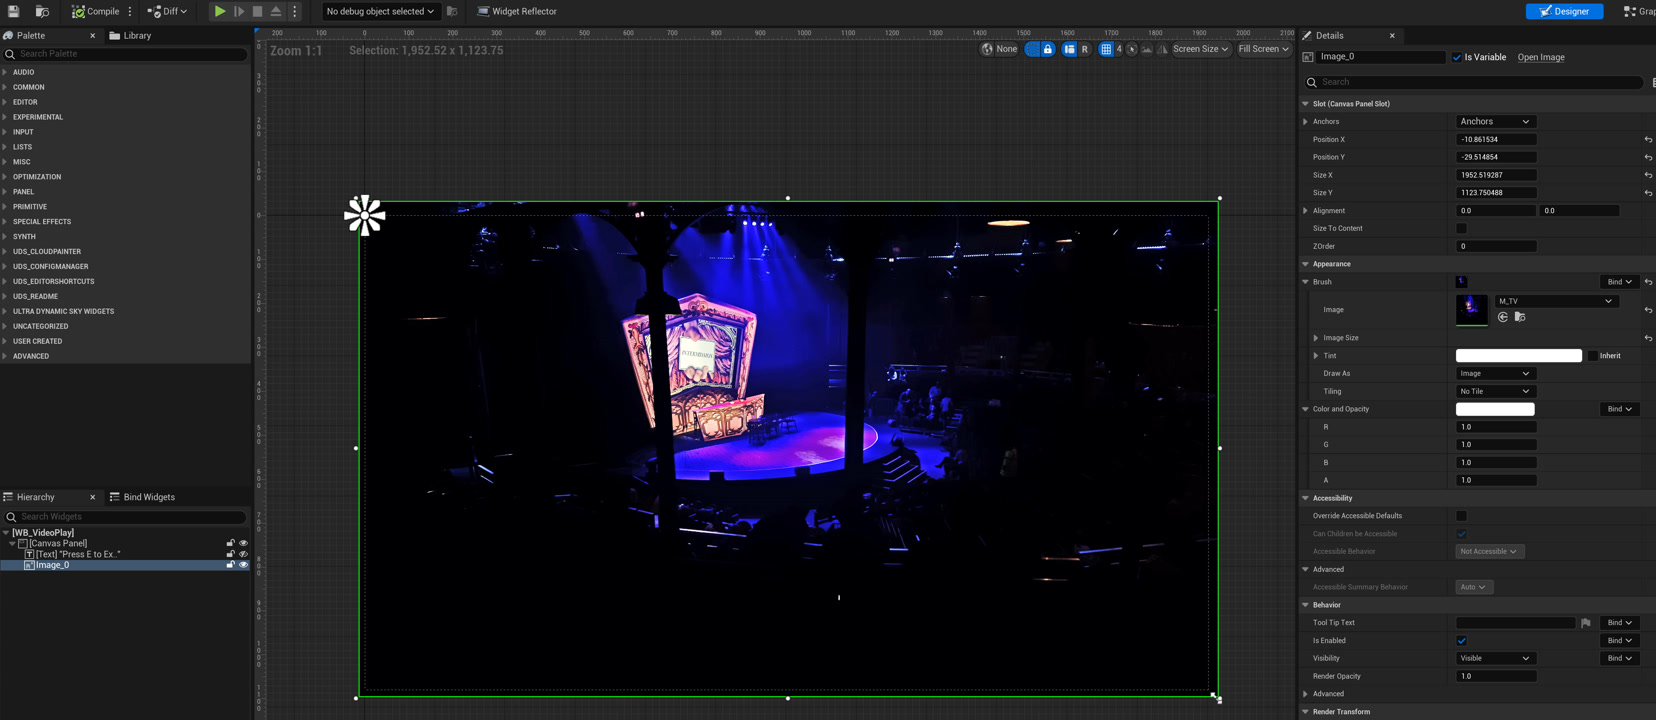
In my case I used this when I had disabled the player character during the playing of a video, but I had no way for the player to exit the video before it got to the end. So, I added the functionality below to only allow for the use the E key to stop the video.
IN THE BLUEPRINT ACTOR:
- For this approach to work I used the Disable Input node.
- For example, create a Blueprint Actor with a collision box that triggers when the player enters the box.
- Then use the Disable Input node to disable the player character. Then add to this node: Get Player Character and Get Player Controller.
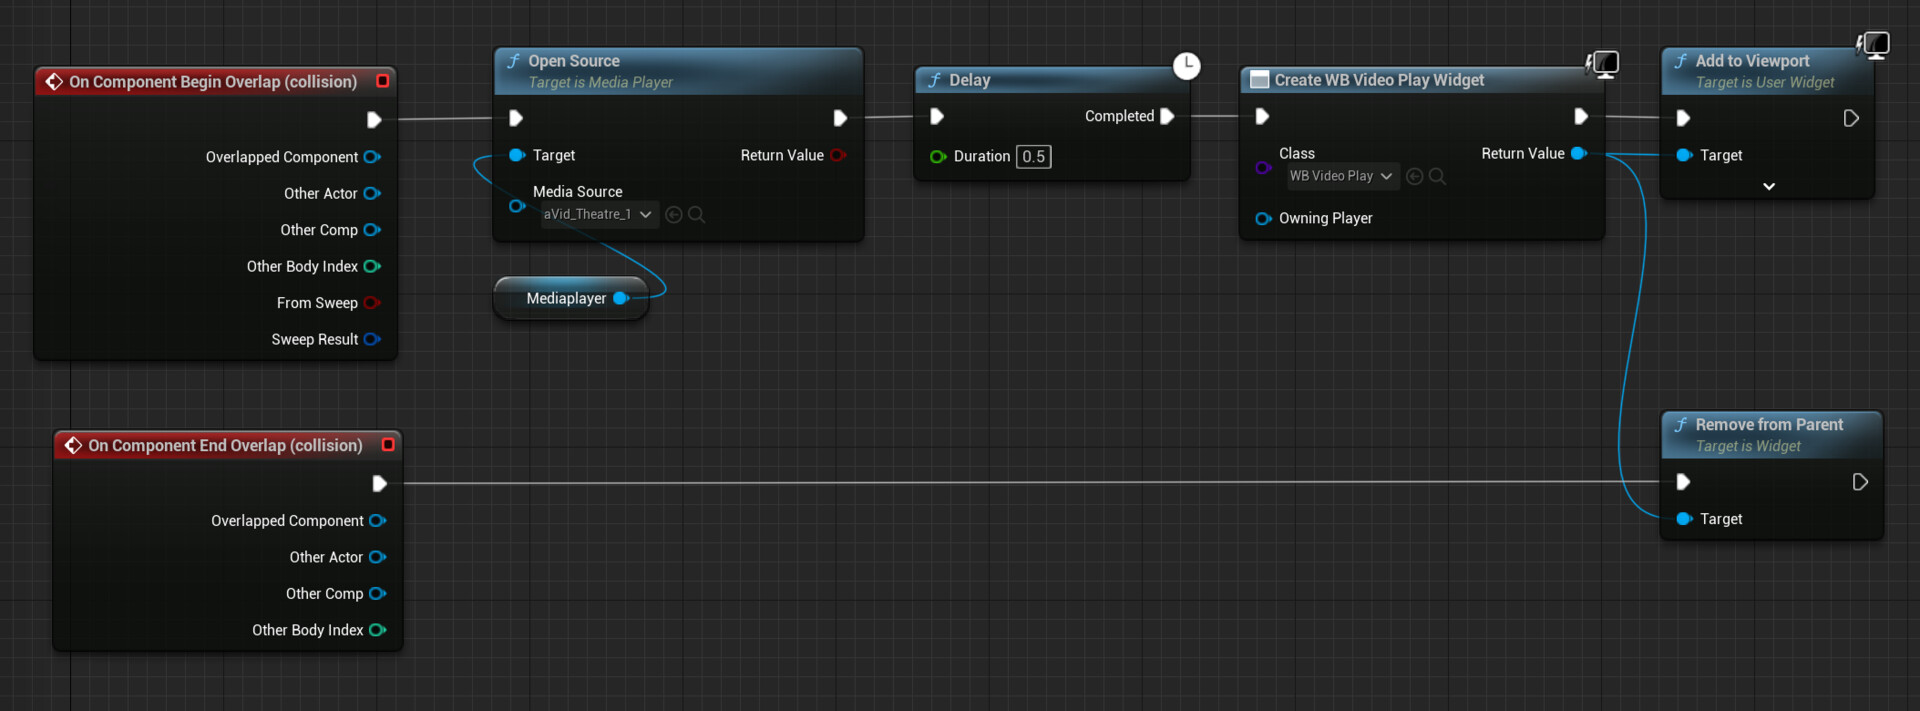
- Please see image below for how this is done and for now ignore the other nodes outside the red lined area – we will come to those shortly.

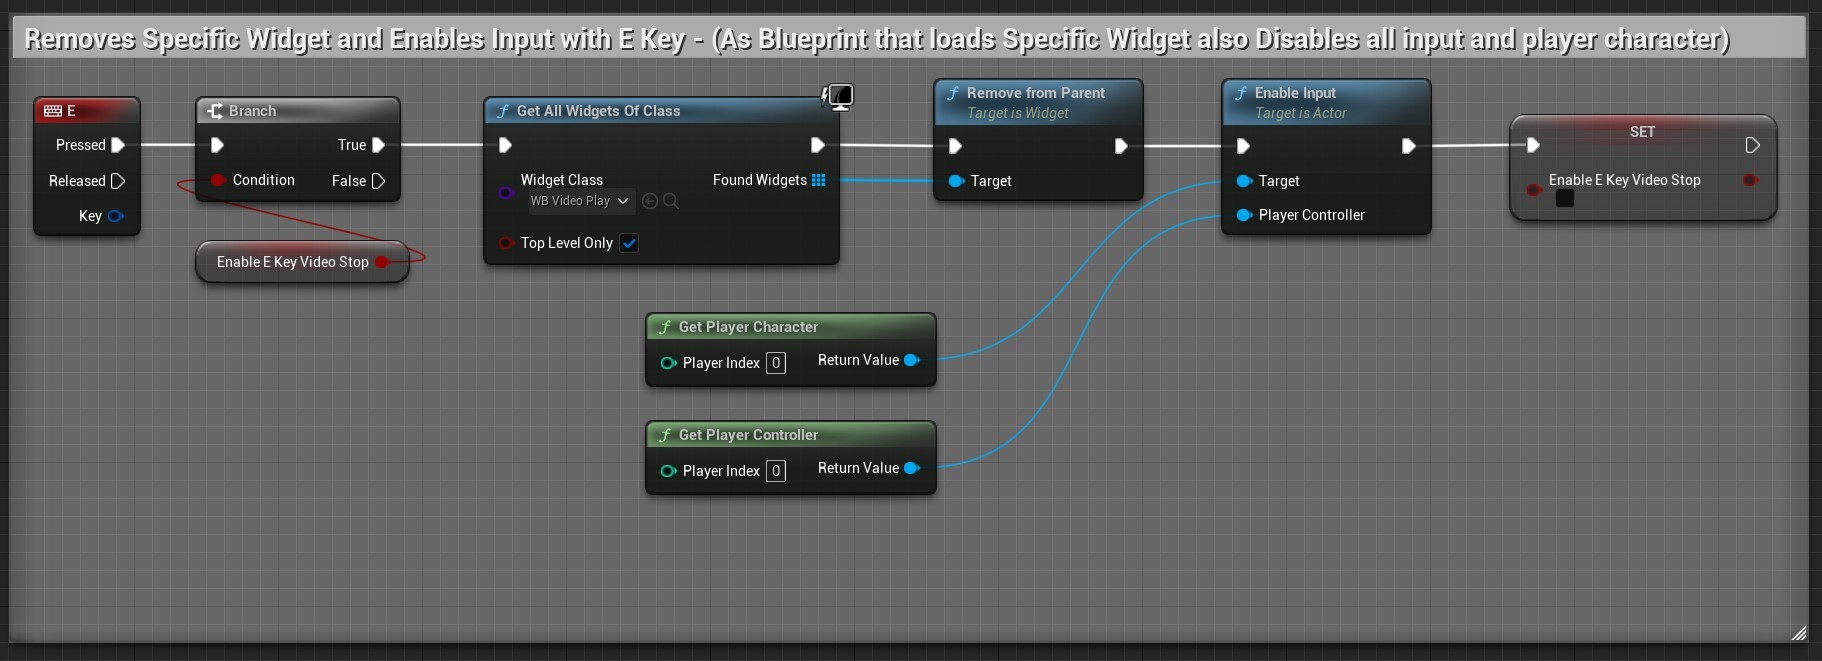
IN THE PLAYER CONTROLLER:
- Create (if required) or Open the Player Controller Blueprint.
- Add in the code below.
- As it’s the Player Controller BP there is no need to add in any interfaces, enable or disable inputs as it automatically recognises key mappings.
- Add a Branch:
- Create a Boolean variable (you can promote the Boolean that is part of the branch node or just create a new bool).
- Call it Enable E Key (for example, but this could be any key you require).
- Add any additional nodes required for your actions:
- Below I’ve added a Remove widget node, but your code will (or may) require something different or nothing additional.
- Add an: Enable Input (this will enable input back in the player character).
- At the end of the node chain – Set the Boolean back to false/off.
- See Player Controller final graph set up below:
BACK IN THE BLUEPRINT:
- Create a Custom event.
- Call it Enable E key (or whatever you require).
- Cast to the Player controller and plug get player controller into this node.
- Drag off the cast node, search for and select the Boolean (created above) and switch the Boolean to on/true.
- Now add the Custom event after the Trigger key/action – so the custom event casts to the player controller and switches the Boolean on.
- This is done so that the enable input connection to the E key only becomes active when entering the specific blueprint (created above).
- See final graph below:
FURTHER INFO ON HOW THIS WORKS:
Boolean Switch: Please note – you don’t need this Boolean and Branch, but I’ve added because if it’s not there the E key and activating Enable Input will be active all the time and will use unnecessary compute power and may conflict with other controls and E key actions.
SUMMARY of HOW THIS WORKS:
In the initial blueprint – the target is what is getting disabled and not the Player Controller. The player controller is basically being used to say do not allow input against the target – which is this case is the player character.
Please also note: You do not have to have the player controller node plugged in. It will still work without it, but does provide more granular control over what is being disabled. The player controller is what acts as the interface between the player and the pawn, so also consider if the player is using a gamepad and how does the E key or interact key relate to the gamepad in this case – as you may require some additional coding.
Technically using this approach, you are disabling the player character (so this includes all the player inputs/keys), but for all intent and purposes you get the same result.
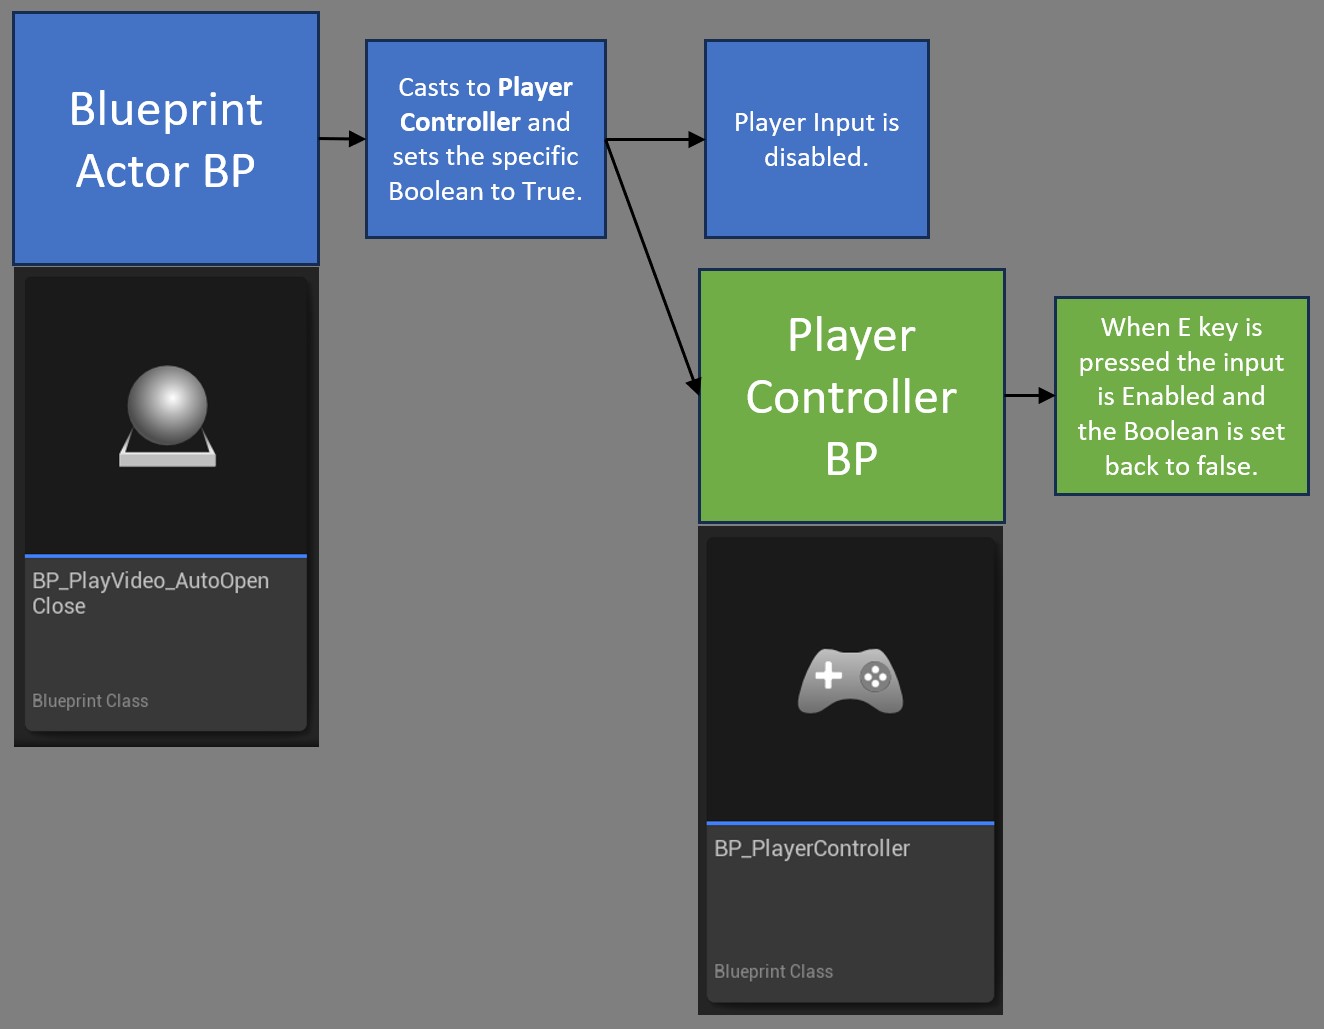
Below is a simple diagram showing the process flow for how this works:

Appendum
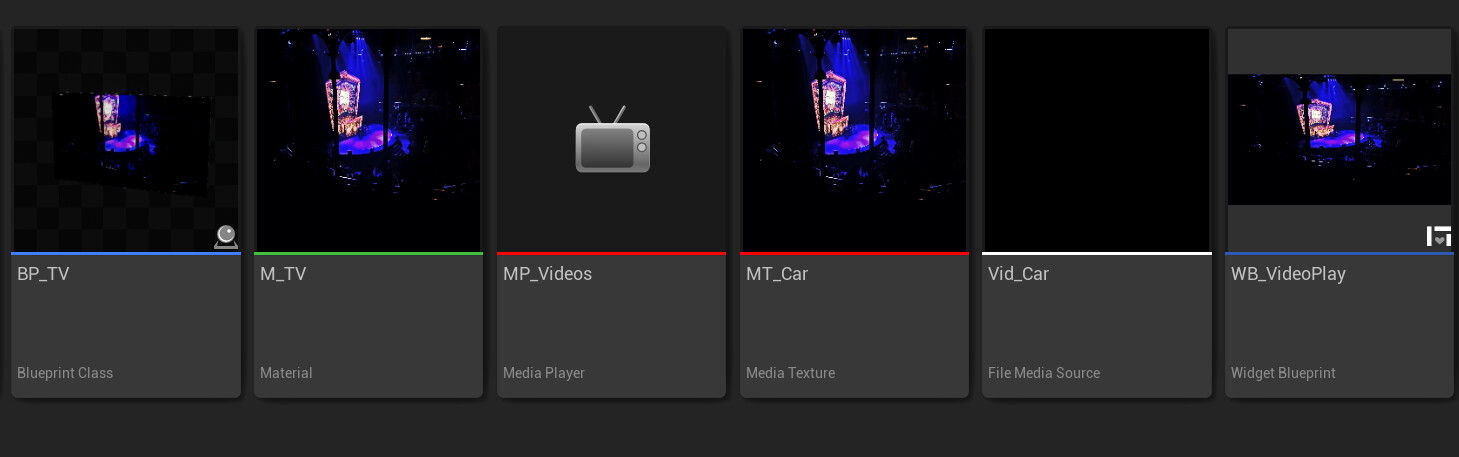
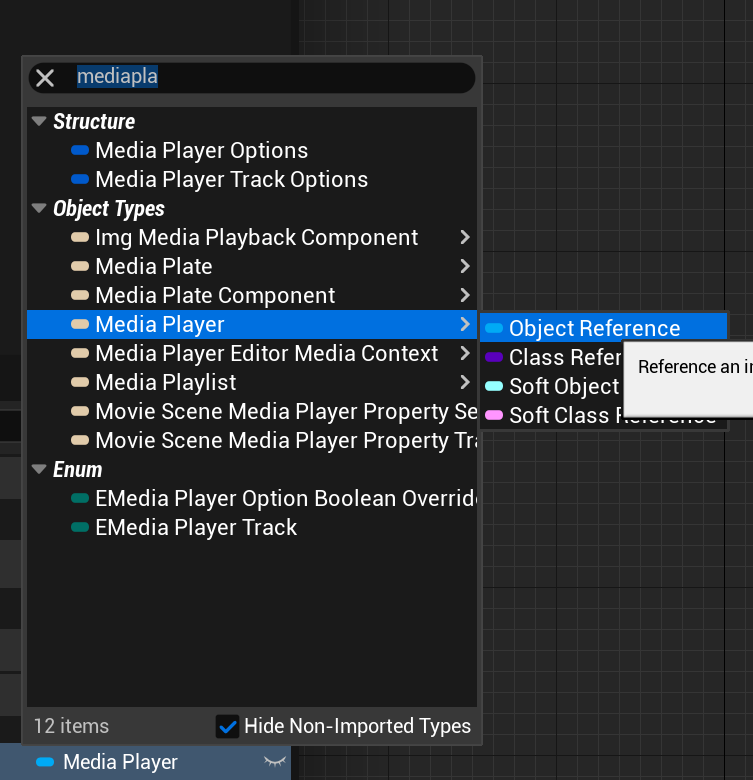
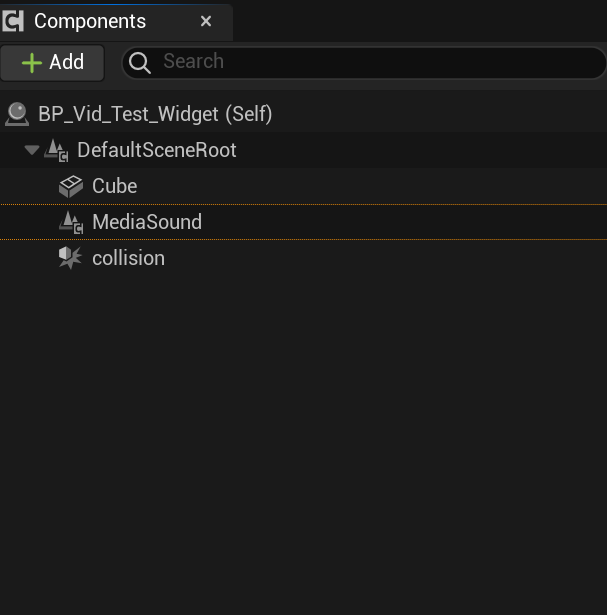
If you are using this specific set up for removing and stopping the play of a video. You can also add the additional nodes at the end (Player Controller) to remove the sound/stop video playing. Otherwise, you will still get audio playing even after removing the widget. (Make sure the in the Media Player variable node details – you select the required Media Player).
I didn’t add this above as it’s specific to a widget playing blueprint and the above is meant more as an overview for one simple way to disable all keys except one.

Related Video Blueprint Tutorials
This tutorial can be used in many different scenarios, but will be useful if you disable input while a player watches a video. Please see below related posts regarding video tutorials.
-
-
-
-
How to Disable Every Key Except One.
For further tutorials on blueprints please see the page here: Blueprint Tutorials or to get started with blueprints please see here: Get Started with Blueprint
If you have any questions, please leave a comment or drop me a message directly.
The post Unreal Engine Blueprint – Disable Every Key Except One appeared first on Motion Forge Pictures.


